

The tail of a tuna is stiff, rigid, and has a bonelike density. Because of this, it is easy to preserve, and although it takes a good amount of time to do it right, it’s an easy and inexpensive process.
Step 1: Remove the Tuna Tail
Remove the tail from the fish; A hacksaw works best. It’s important to leave about 3 or 4 inches of “meat” at the base of the tail, which will help keep the skin tight while drying and then will get trimmed down later in the process.
Step 2: Air Out the Tuna Tail
Depending on the weather, a tuna tail can take two to three months to completely harden up. Keep the tail high off the ground and hang it in a well-ventilated area that is out of the reach of animals and the elements. I hang mine on the side of my shed, under the overhang from the roof. You can either use a screw-in hanging hook or drive in two nails about 3 inches apart. Things will get ugly in the first few weeks. The tail will stink and attract lots of flies. Racoons love them as well, so keep that in mind when selecting a hanging location.

Step 3: Cut the Base of the Tuna Tail
Once the tail is completely dried out, the next step is to trim off the tag end. A miter box saw works best, but you can get away with handsaw in a pinch. Just make sure to get an even cut. During the cutting process, you will smell an interesting, pungent, and unpleasant aroma that’s a cross between burning hair and sour fish. Don’t worry – the smell will go away once the tail is painted.


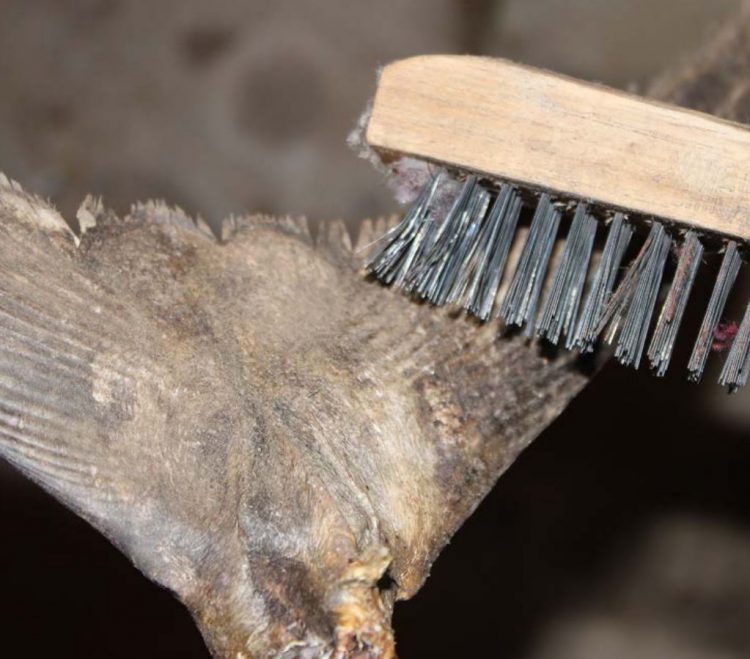
Step 4: Brush the Tuna Tail
Take a wire brush and give the tail a good scrub, making sure to remove all the dirt and debris on its surface.
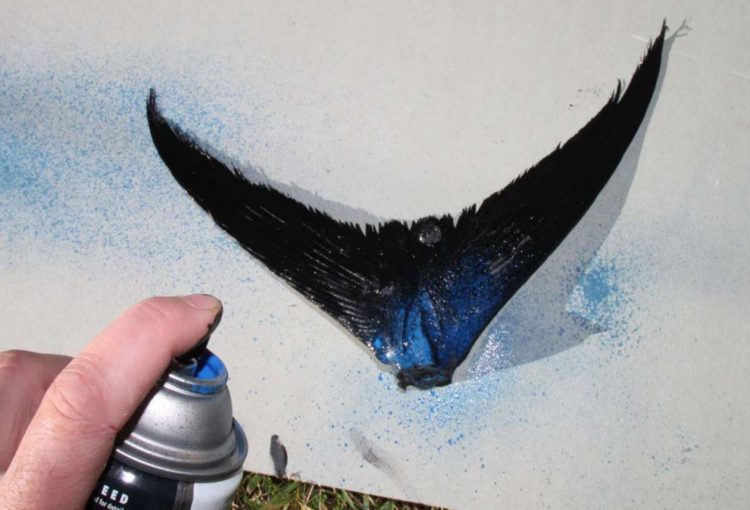
Step 5: Paint the Tuna Tail Black
The tail is now ready to be painted. Place some scrap cardboard or old newspaper on the ground and give the tail a solid coat of glossy black spray paint. (Be certain to do this outside in a safe place out of the wind.) Apply at least two coats to ensure paint gets into all the nooks and crannies. Take your time, let the tail dry between layers, and keep applying light coats until the tail is completely sealed and glossy. Keep a keen eye out for dripping paint, which is about the only way you can mess up this step.

Step 6: Add Spray Paint Highlights to the Tuna Tail
At this point, you can simply walk away, as your tuna tail will look dapper with only the glossy black paint job. I like to work in a little more color, though, so I spray on some subtle highlights of deep blue, silver, and maybe even purple. Adding highlights works best when you apply them while the black paint is still wet. Add the highlights slowly, just a little at a time. Don’t worry about messing up, as you can always paint the tail black again and start over.
When the paint is dry, adding a few coats of glossy polyurethane helps protect the tail and gives it a little more shine. Adding a base is another nice addition. For short money, you can purchase a pre-made mounting plaque (check your local craft store) to make a nice base and add some stability. Simply drive a screw up through the plaque into the base of the tail.
If all goes well, your tail will look as fresh and real as the day the fish was plucked from the sea.

Related Content
Article: Bluefin Tuna Chunking
Article: Identifying Bluefin vs Yellowfin Tuna
Article: Determining Where Bluefin Tuna Come From
Article: Jigging for Bluefin Tuna

That there is some fine craftsmanship if I ever did say so…